Connect your metamask to your avalanche node in dappnode
In this guide, I explain how to install metamask, how to create an avalanche wallet and how to install the avalanche package. If you are only interested in how to connect metamask to your avalanche node in dappnode, you can go directly to the last point.
Requierements:
- Avalanche dappnode installed
- Metamask
- Dappnode VPN configured
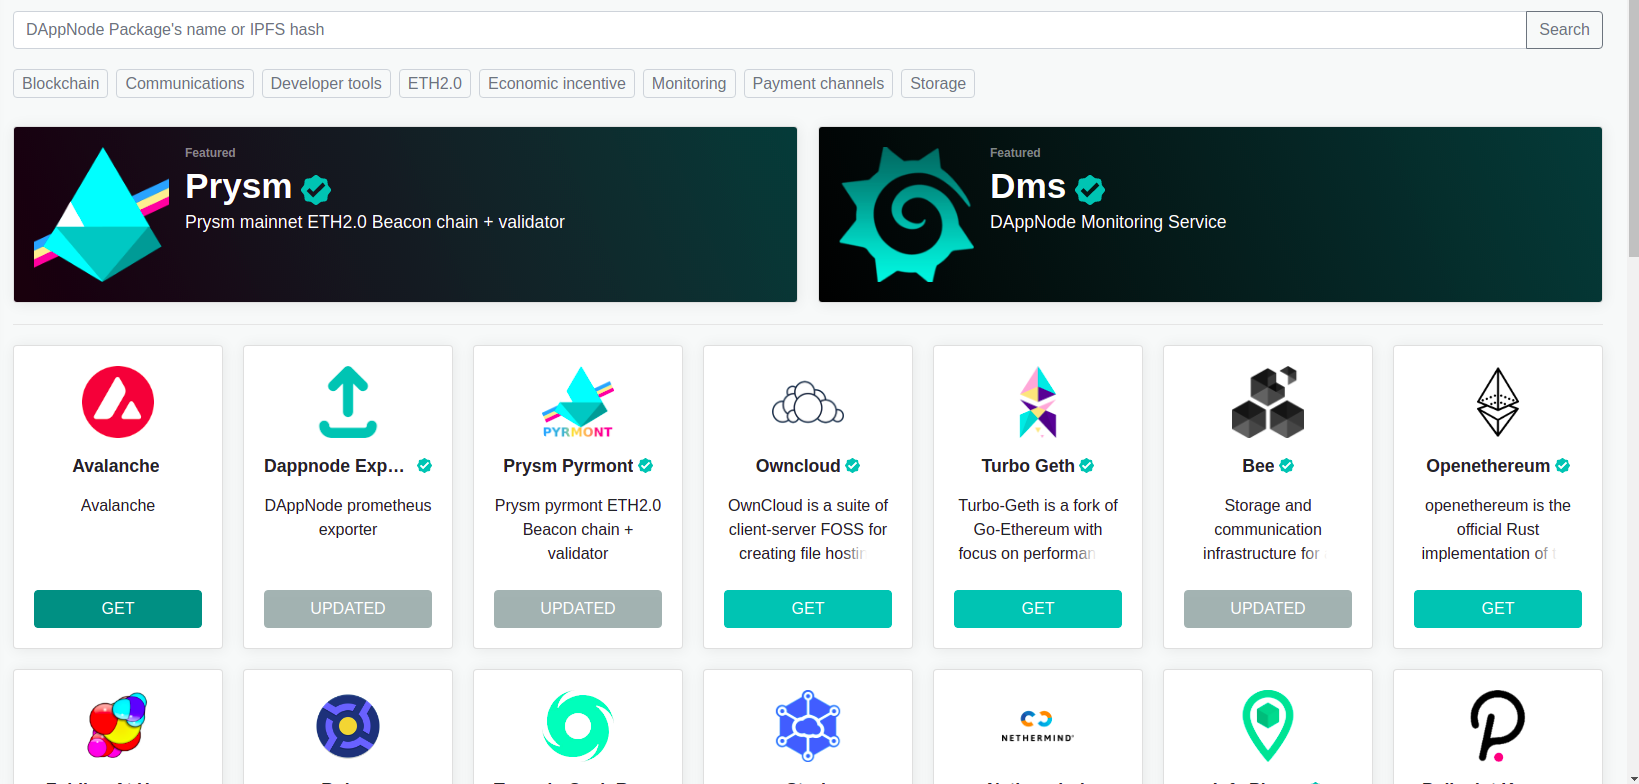
1. Install the package
To Install this package we do what we have to do to install any package on DAppNode and click on the install button.
We go to DAppStore.We search and click on the GET button.
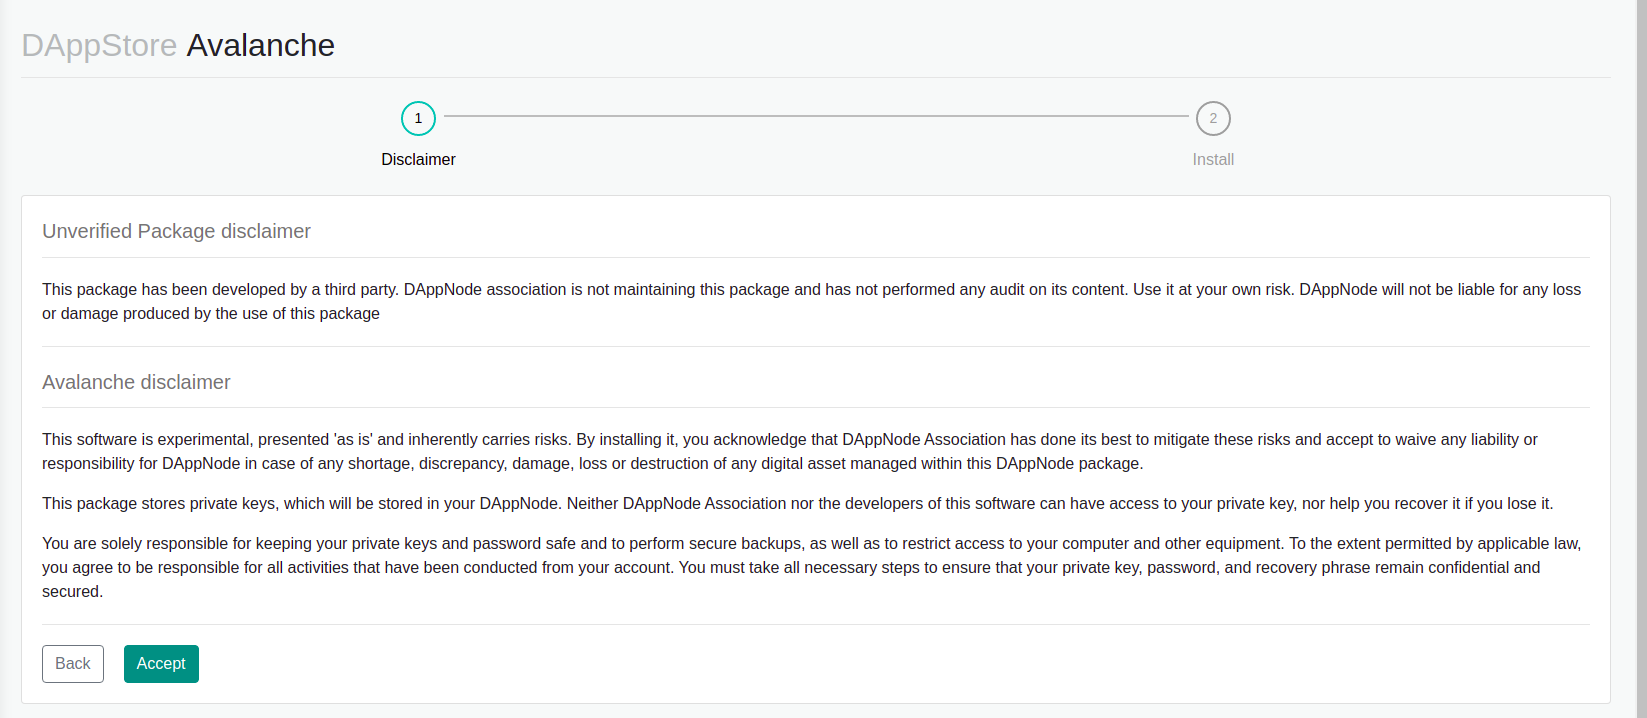
We then press the install button to install the Avalanche package in our DAppNode.

We accept the Disclaimer.
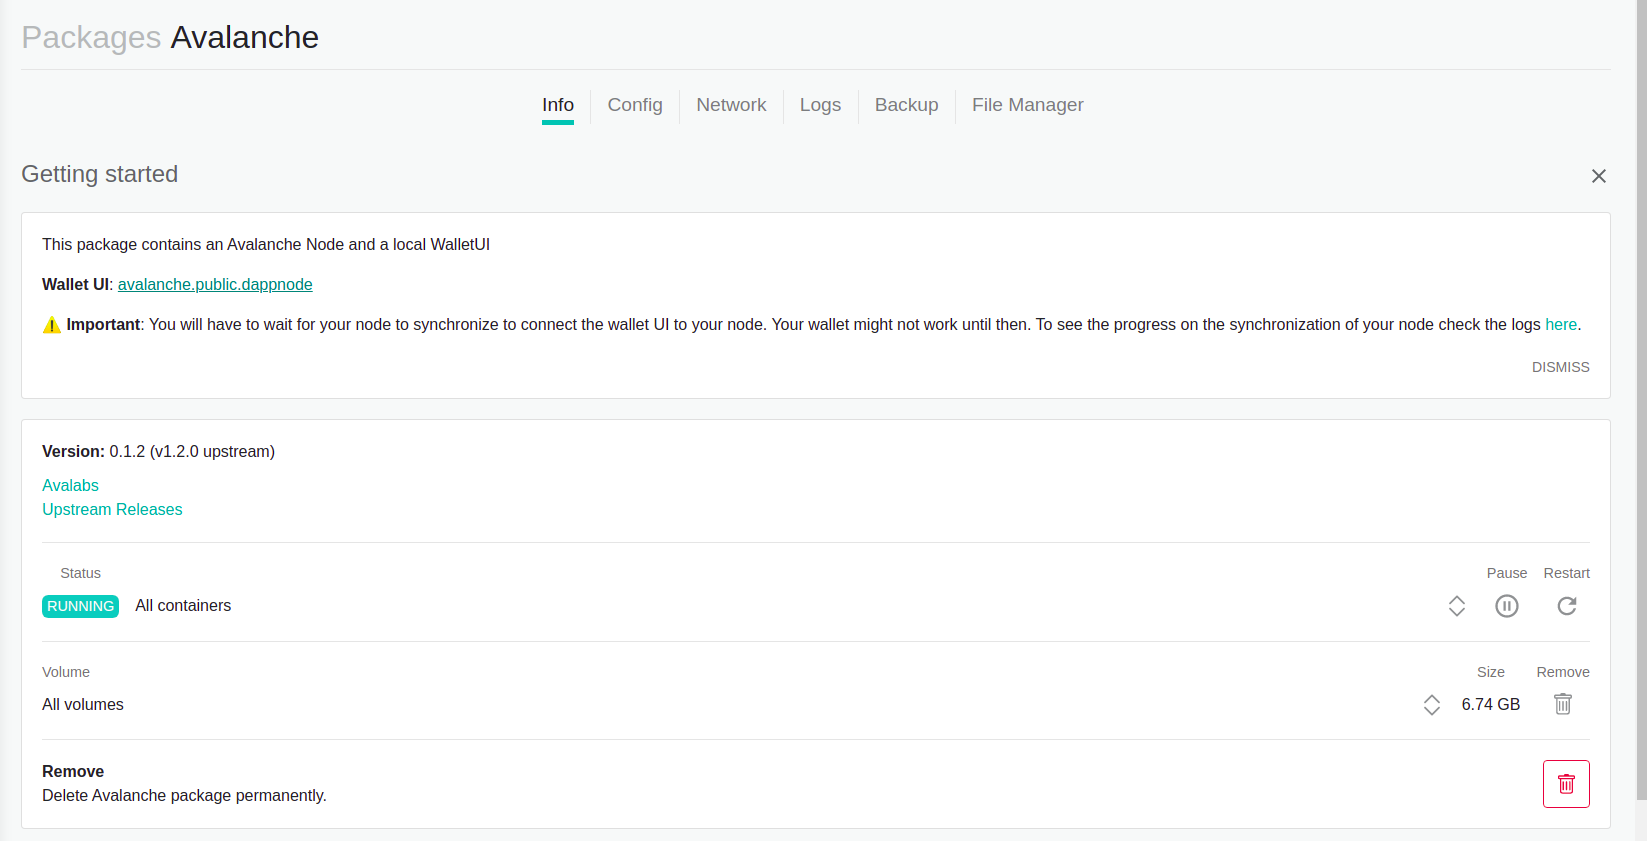
After one or two minutes we will be redirected to the package page, we can access it in another way if we go to packages > Avalanche and can quickly go to this page.

What did we do in this step?
We installed 2 things:
- Our avalanche node
- Avalanch UI
What advantages do we have in doing this?
- We have OUR OWN node. This implies we DON’T depend on others to communicate with the network, for example, if the nodes are too busy, we can suffer connectivity problem. That can affect the time our request comes to the network.
- More secure, the communication we do between our metamask and our node is “locally”, then our node sends our operation directly to the network.
After installing the package, our node needs to synchronize with the network to be enabled. We have to wait a while. We can check if the process is finished on the log section:
Synchronizing:
INFO [02-25|22:17:55] <P Chain> avalanchego/snow/engine/snowman/bootstrap/bootstrapper.go#278: executed 232500 blocks INFO [02-25|22:18:34] <P Chain> avalanchego/snow/engine/snowman/bootstrap/bootstrapper.go#278: executed 235000 blocks INFO [02-25|22:19:13] <P Chain> avalanchego/snow/engine/snowman/bootstrap/bootstrapper.go#278: executed 237500 blocks INFO [02-25|22:19:45] <P Chain> avalanchego/snow/engine/snowman/bootstrap/bootstrapper.go#278: executed 240000 blocks
Finished:
FO [02-25|21:53:25] <X Chain> avalanchego/vms/avm/service.go#235: AVM: GetAssetDescription called with AVAX INFO [02-25|21:53:25] <P Chain> avalanchego/vms/platformvm/service.go#584: Platform: GetStakingAssetID called INFO [02-25|21:53:25] <X Chain> avalanchego/vms/avm/service.go#235: AVM: GetAssetDescription called with AVAX INFO [02-25|21:53:25] <X Chain> avalanchego/vms/avm/service.go#235: AVM: GetAssetDescription called with AVAX INFO [02-25|21:53:26] <P Chain> avalanchego/vms/platformvm/service.go#798: Platform: GetPendingValidators called INFO [02-25|21:53:26] <P Chain> avalanchego/vms/platformvm/service.go#621: Platform: GetCurrentValidators called
2. Create an Avalanche wallet
When the node is synchronized, we go to the UI. We can access this link via DAppNode UI avalanche. Or click on the wallet UI on the Packages > Avalanche.
We will be redirected to a page like this:

Above check it says DAppNode Mainnet, this means we are connected to our DAppNode Avalanche Node.
We click on CREATE NEW WALLET button.

We select generate key phrase.
You will see something like the following, you must write down those words, it will be the only way you can recover your avalanche wallet. It’s very important you do this correctly.
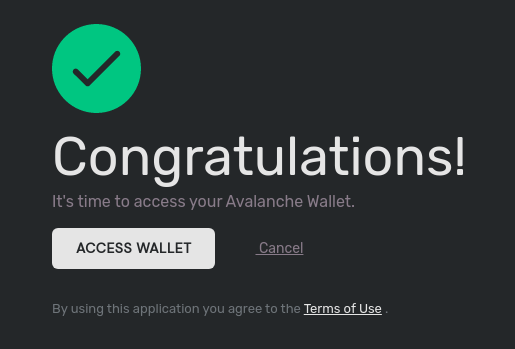
After copying in several secure places, we accept and click on ACCESS WALLET.
You will have to verify that you are copied the words correctly.
I recommend you log out and back into the account so you are 100% certain we have written down correctly the words. We click on log out and we click this time on the ACCESS WALLET button instead. Now we can select several options:
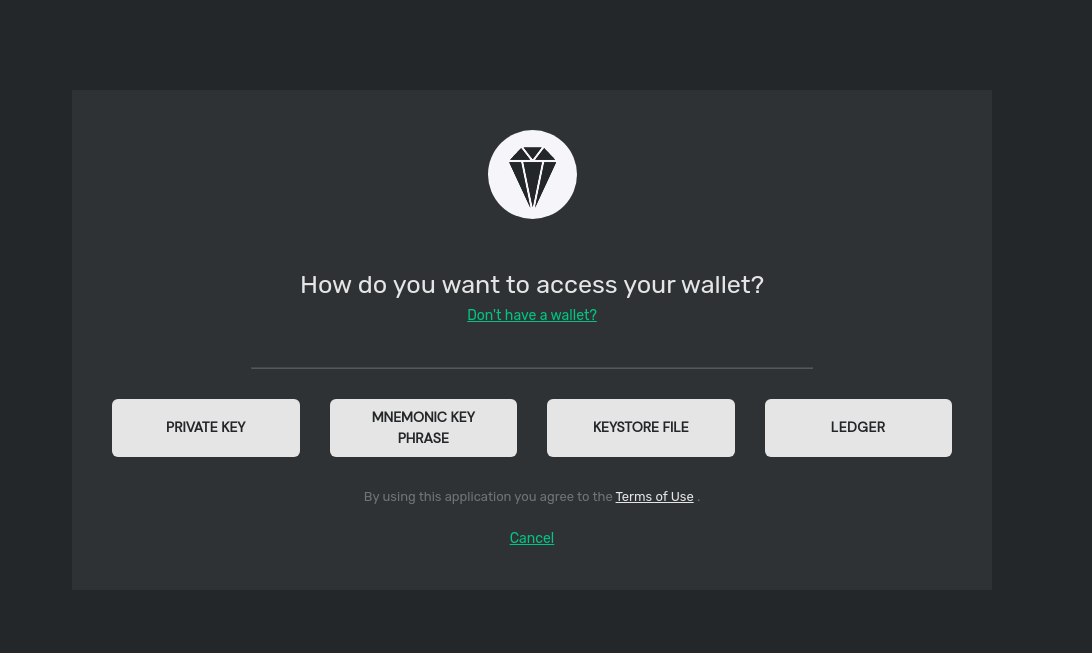
For now, we can only access it by using the MNEMONIC KEY PHRASE.
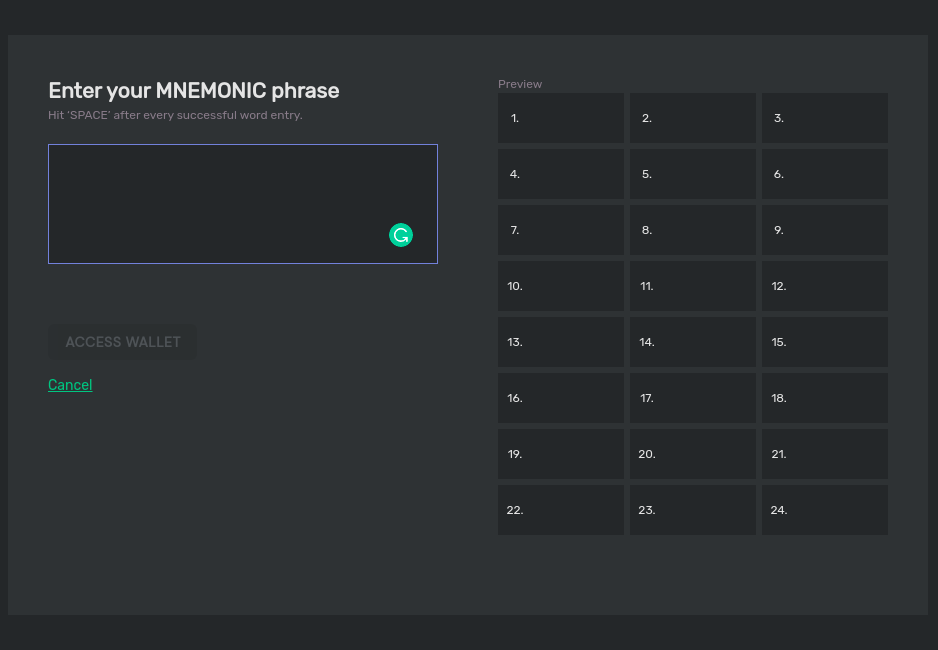
We type in our 24 words.
After typing our 24 words we will see the Avalanche interface:
3. Connect your metamask to Avalanche Network
3.1 Set up metamask for Avalanche Network
I will explain how to do it from the scratch.
- Install metamask firefox. https://metamask.io/
- Configure your Metamask wallet.
- Click on this metamask(where we want to use avalanche). We will connect this metamask to our avalanche node.
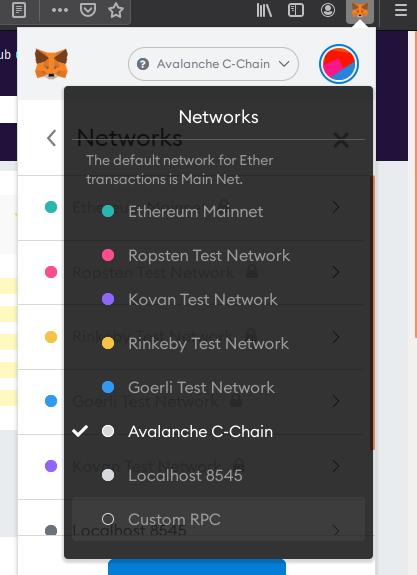
Click on the MetaMask icon, click on the “Networks” and select CUSTOM RPC.
NOTE!: To be able to connect to your own avalanche node on DAppNode, you have to be connected to the VPN.
We have to fill these fields with the next content:
Network Name: Avalanche C-Chain
New RCP URL: http://avalanche.avalanche.public.dappnode:9650/ext/bc/C/rpc
ChainID: 0xa86a
Symbol: AVAX
Explorer: https://cchain.explorer.avax.network/